Friday, December 12, 2014

Buying Spare Parts: Brake and Brake Shoe (Part II)

Repairing a bike is quite easy as long as you know how to do it and what to look out for when you buy spare parts. A good example of ignorance is when I tried to buy a tube for my back wheel. I bought the wrong size of air valve (too short) and the wrong size of tube itself (wrong diameter). The durability of the tube was extremely low as it only held out 100 km before bursting. Hence it is crucial to buy the highest quality of spare parts and it is of the utmost importance to know which spare parts are needed for your bicycle in particular.

I'll give you a list of products that you might need first. You will have to read through the tutorials before buying the parts, as you are probably not aware of what is needed and what isn't. Throughout the article I will use the abbreviation [opt.]. It means that it is not a necessity, but it might save you time and nerves if you use it. It won't ensure better quality though. The quality solely depends on your handiness and you using your brain.

Spare-parts list


Pyramid - Mx1000 Alloy BMX Bicycle Brake, Front or Rear, Black (very cheap and not sturdy)


SRAM Apex Brake Caliper Set (WITHOUT CABLES; high quality)


ORIGIN8 Sport Comp V-Brake Set (medium quality; complete set; good for your average bike)


SHIMANO ST-EF51 Brake & Shifter Levers Combo Set 3x8 Pair With Shift Cable And End Caps (only cables and housing; brakes themselves are still needed)


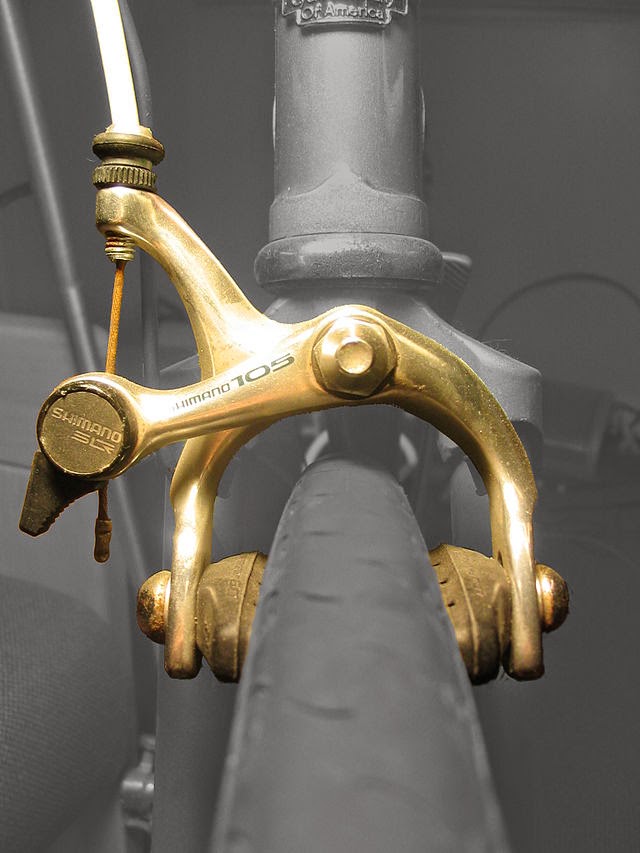
Campagnolo - Veloce Silver Dual Pivot Brake Set (expensive but high quality; only the dual pivot brake is delivered)


10 Pcs 1.77M Length Bike Replaceable Cycling Rear Brake Cable (low quality; high quantity buy)


Shimano Brake Cable and Housing Set (Universal)

Spokewrench for trueing and alligning your wheels
Avenir Spoke Wrench Set
In my opinion, it is always good to have spoke wrenches. Your brakes might seem to be broken bbut the problem might as well be caused be a bent wheele. You can true / allign your wheel at any time and before the damage is so severe that a spoke wrench can't fix it. An alternative would be to use a normal wrench even though this works a lot better.


Issues regarding the brakes

As the problems can be so diverse, I think it is wisest to start with the smallest problems and move to more complex issues. If you look at the brake lever on the handle bar, you'll see a small screw and a slightly bigger screw. The big screw is the "brake barrel adjuster" and the small screw is the "adjuster locking ring". With this screw you can adjust the tension on the brake and increase or decrease braking power. I regard this as the easiest fix for a very common problem.

Repair guide: easy cases

Now that we've covered the easiest way to increase braking power, we can move onto the more complex issues.

Centering your wheel might be a solution to a problem you might have. Do you know the feeling when every time the wheel fully rotates, it feels like the brake makes contact with your rim? Tip your bike or hold it while rotating the wheel. Does the rim make contact to a brake pad? Does the wheel look crooked? Well, there can be 2 possible problems: 1. your wheel is not straight in the fork; 2. your wheel is bent. To solve a bent wheel, please look into this guide. To fix the first problem, just unscrew the wheel on both sides and fix the problem by repositioning your wheel.

Check your brake blocks to see if they are worn out. If needed, you can use a list of spare parts that I'll provide. Also make sure that both blocks are perfectly opposed to the rim so that the full block connects to the rim (in stead of only a partial connection). Should a brake block change be needed, be sure to change both blocks. You can check our spare-parts list to find different kinds of brake shoes.

Check the noodle to see if it is connected. I know it sounds stupid but sometimes one can overlook the simplest thing. The noodle is the metal tube at the end of the braking cable that clamps in the cable housing. Sometimes it doesn't fully clamped in the cable housing, which causes less tension on one brake and no tension at all on the other.

Repair guide: normal cases

These problems are a bit harder but still quite easy. You will notice that impatience is your enemy, mainly because you need a steady hand and some trial and error. So take your time, don't give up and try to use your head a bit. Just think logically and mechanically.

If there still isn't enough tension on the braking cord, make sure that you know (!) which kind of brake you have. Not every brake is built in the same way. Anyway, at the very end of each cord, there is a metal nipple which is attached to a screw. Should you unscrew it, the metal cable will lose tension and you are able to pull it a bit further than it was before. Screw it in again (...) and test your brakes to see if the increased tension is better.


Repair guide: hard cases

Replacing the brake altogether is also a possibility if your brake is really destroyed beyond repair. I couldn't imagine the brake being so damaged it would need replacement. Maybe when a maniac with an axe would turn his rage on the poor brake, I could imagine replacing it seems necessary. As every brake is different, I cannot give you full details to replace the brake altogether. One can assume that there is a manual with every brake you buy.

Replacing the brake as a whole

However, for those who haven't got a manual or tutorial on how to install a brake, I will crudely explain how to change the brake-set (cables, housing+lever, brakes).

Always start with attaching the lever on the bicycle. You will start from the lever and move to the actual brake, as you need to adjust the tension of the iron cord at the end of tutorial. As soon as the lever is attached to the handlebar, start with clamping the 'nipple' inside the lever. Move the iron cord through the barrel adjuster and put it in its middle position. That way you can tighten or loosen it after you are done. Having it screwed all the way in or out renders your barrel adjuster useless.

Moving on... You have attached the lever, clamped the brake cable nipple and now you are standing there with a brake cable in your hand. Start directing the cable along the top tube for the rear brake and directly to the fork for the front brake. If you haven't attached the brake to the front fork or rear seatstay (the bar diagonally under your seat) before I told you to do so, do it now.

Next step is to put the last bit of wire through the brake itself and to put the right amount of tension on the wire. You do this by pulling the wire and simultaneously tightening the screw.

Good luck!

Buying Spare Parts: Brake and Brake Shoe (Part I)

Repairing a bike is quite easy as long as you know how to do it and what to look out for when you buy spare parts. A good example of ignorance is when I tried to buy a tube for my back wheel. I bought the wrong size of air valve (too short) and the wrong size of tube itself (wrong diameter). The durability of the tube was extremely low as it only held out 100 km before bursting. Hence it is crucial to buy the highest quality of spare parts and it is of the utmost importance to know which spare parts are needed for your bicycle in particular.

I'll give you a list of products that you might need first. You will have to read through the tutorials before buying the parts, as you are probably not aware of what is needed and what isn't. Throughout the article I will use the abbreviation [opt.]. It means that it is not a necessity, but it might save you time and nerves if you use it. It won't ensure better quality though. The quality solely depends on your handiness and you using your brain.

A list of spare parts for your bicycle that you might or will need throughout this guide


Replacing your brakes and replacing a brake shoe (brake pad or brake block)

Before I start explaining, you will have to be aware that there are different kinds of brakes. What kind of brake you have is important to know how to replace it. Some of the brakes I will refer to are obsolete. I only mention them so you can understand the many changes the bicycle brake went through.

Spoon brake (or plunger brake)

If you have a spoon brake, you must have an antique bicycle. A spoon brake metal plate is directly pressed upon the tire of the wheel. The plate is attached to a rod that is mostly positioned at the right side of the handle bars. I doubt the fact that you will have to replace this part as it is not manufactured anymore.

Duck brake (Duck roller brake)

This brake made the spoon brake obsolete and was invented around the end of the 19th century. It was operated by a rod connected to a lever on the handle bar. You can brake by pulling the lever, so that 2 friction rollers are forced against the front wheel.
Source: earlymotor.com/leon/bikes/california/images/duck.gif

Coaster brakes, Back Pedal Brakes, Foot Brakes, Torpedo or Contropedale

By reading the title, you know which brake comes next. I like this brake a lot and associate it with a classic Dutch 'granny bike'. A granny bike (oma fiets) is a very typical bicycle with very typical features. It's always a ladies' bike, has a classical touch (design, slight rust, colour, etc.) and has no gears or three gears. Oh, and it has a back pedal brake. Just enter 'oma fiets' in Google and you will see what bike I am talking about.

A coaster brake is located in the back hub of the wheel. It is operated by pedaling backwards, which makes the sprocket drive a screw which forces a clutch in the opposite direction of the axle. This will either force two brakeshoes against the brake mantle or into a split collar expanding it against the mantle.

Rim brakes: many variations of the same kind of brake

There are so many kinds of rim brakes. Even though the basic principle is the same, they differ on many levels.

It will take a while to make repair guides for all these sub categories of rim brakes. As there are so many kinds of rim brakes, I will spread the tutorials over a few articles, making sure that I will cover all variations of rim brake in one article.

Rod brake

A rod brake, also called a rod-actuated brake or stirrup brake (due to their shape), is used by pulling a rod that is placed under the whole handlebar. The rod is connected to a brake with brake shoes. The brake shoe presses on the rim, to stop the wheel from rotating. These brakes are still in use in the third world.

Caliper brake design

Single-pivot side-pull caliper brakes

The Caliper brake design is a type of brake in which the brake mounts to a point above the wheel, allowing the arms to auto-centre on the rim. The single-pivot side-pull caliper brakes consist of two arms that cross at the pivot and hold the brake shoes on the opposite side of the rim. When the lever is pulled, the arms will contract, making the brake shoes press upon the rim. This brake is used on older racing bikes. I have an old bicycle (not here now though), so I'll have a look at my brake.
Source: upload.wikimedia.org/wikipedia/commons/thumb/8/80/Bicycle_caliper_brake_highlighted.jpg/170px-Bicycle_caliper_brake_highlighted.jpg

Caliper brake design: Dual-pivot side-pull caliper brakes

Most modern race bikes have a dual-pivot side-pull caliper brake. The cable housing attaches like that of a side-pull brake. One arm pivots at the center; the other one pivots at the side, much like a center-pull.

Caliper brake design: Centre-pull caliper brakes

I have had this brake on 80 % of my bikes. This is like the most typical brake. A small lever on the left and right side of the handle bar is attached to the front and rear tire of the bike. The brake consists of the arms, symmetrically opposed to eachother and connected in the middle with a screw. On the end of these arms are brake pads, which positioned opposed to the rim. These brake arms are connected to the lever by iron cables and - before the cable reaches the arms - these cables get split using a 'sliding piece' (also called "braking delta", "braking triangle" or "yoke"). The tension will be evenly divided between both braking pads, making these braking pads ideal to true your wheel ( see: Trueing your wheel: buying-spare-parts-wheel-part-2.html ).

U-brakes (990 style brakes)

Commonly used on BMX and considered as the default brake. The caliper design with pivots is right above the rim. The arm pivots attach directly to the frame as opposed to the centre-pull brakes. In its maintenance, it is quite similar to roller cam brakes.

Cantilever brake design

All cantilever brakes are dual pivot brakes, where each arm is attached separately on one side of the fork. This brake is mainly used for wide tires, commonly used on city bikes and mountain bikes.

Traditional cantilever brakes

The traditional cantilever brake even predates the direct-pull brake. It consists of 2 outwardly angled arms on each side, a cable stop on the fork to terminate the cable housing, and a cable connecting the arms like a centre-pull caliper brake.

V-brakes

The V-brake is a trademark of Shimano and is also called linear-pull brake. With no intervening mechanism between the cable and arms, it is also called a direct-pull brake. A cable moves from the lever on the handlebar towards the cable housing. Before it reaches the cable housing, it will move through a 'noodle'. This is a metal tube that moves 90° to the cable housing, which is placed horizontally above the tire. The end of the cable is attached to the arm opposed to the side of where the cable came from (normally on the right side). If the cable would only be attached to this arm, then it would be the only working brake pad, as there is no pressure on the other brake arm. Here the noodle comes in to play. The noodle is clamped in the cable housing and pulls the other brake arm simultaneously. I'd say that it is the most important part of the brake and should be qualitative. You wouldn't want it to bend when you need it most.

Mini-V-brakes are also a kind of V-brake but smaller. Not going to write to much about this one.


There are more kinds of brakes but I am not going to spend time on it right away.
  • Roller cam brakes
  • Delta brakes
  • Hydraulic rim brakes
  • Rim brakes with self-assisting characteristics
And then there are more categories than rim brakes like disc brakes, drum brakes, drag brakes and band brakes.

We will get into that too. First I'll have to work on the repair guide. You'll read about that in part II.
Thursday, December 11, 2014

How to stay in shape: Cycling to the Groceries store, work and to a party

Wouldn't it be great if a change in routine would be able to make you :
- experience the upsides of a healthy condition
- save time on your work-out schedule
- spend a considerable amount of time outdoors (every day)
- leave the car at home more often (lower mileage & less gasoline)

Cycling to work

It sounds like an obvious thing to say, but cycling to work is the easiest way to get in shape and I have no idea why some people aren't trying it. If you'd normally drive 15 km (one-way), then you could leave half an hour earlier, assuming that the route would take you 15 minutes by car and 45 minutes by bike. On a normal working day, you would spend 1 hour of your leisure time on exercise. An hour per day spend on exercise would be a very healthy habit for the overweight, office clerks, (taxi/truck/forklift) drivers, and so on. It's just a small adjustment but it could change a lot over time.

Now some of you may dismiss this very idea, thinking it cannot be applied to your lives. Well, that is just a lazy excuse. Conveniently rejecting the idea of cycling to work on the basis of distance, time or physical shape is just an excuse for the fact that it takes effort which you aren't willing to take with your currect state of mind.

Distance is an often used excuse for people. Let's say you'd have to travel 40 km to work. Traveling solely per bike isn't an option, so why not combine taking your car and your bike? Pick a spot on your way to work where you can park your car. Just pick a secure spot with preferably a few bicycle stands. If possible, use bike stands with a roof on top, so your bike stays dry. Now you can drive to your bike, that stays there the whole week (so buy a decent lock!), and cycle to work daily. Who knows, you might get other colleagues to follow your example.

Another excuse to not cycle to work is time. "In the morning, I don't even have time to have breakfast and drink coffee" is one of the well known excuses. First of all, if you pedal to work on a daily basis, you do not need coffee. It's very different from sitting in a heated cabin on your way to work, whilst moving your foot slightly up and down and shifting gears to change the speed of the vehicle. Second of all, if you'd get up earlier and make a habit out of that, picking up a bike shouldn't be that hard either. A lot of people, if not most people, have trouble getting up. It doesn't mean that you couldn't change that if you'd try to get up earlier. However, as time could actually be a valid excuse sometimes, there are other ways to stay fit on other occasions besides going to work.

Physical shape - by which I mean being fat - is never a reason to not cycle. It is the exact opposite of that excuse, namely that a bad physical shape (being really fat) is the reason to cycle.

Groceries and weekend

Everywhere I have lived up until now there was a certain type of person who just doesn't bother to not use a car. I have lived in small towns as well as big cities in 4 different countries. I would estimate that the distance to a baker or butcher would have been 2 km max. A distance like that is peanuts when cycling, yet there were people who are too lazy or too 'busy' to overcome this distance using means of transportation other than a car, subway, tram, bus or taxi. Especially in cities, I really did not understand their motives. You are faster per bike than by metro in most cases.

The point that I'm making is that cycling to the super market or to weekend activities (party, hobby, etc) is a good way to stay active and healthy. Here are also some of the general excuses from people who take their car in stead of their bike: 1. groceries weigh too much; 2. weather is bad; 3. too drunk.

My answers to these excuses: 1. buy sidebags for your bicycle or a cargo trailer; 2. buy a raincoat; 3. ??? How can you be too drunk ???

Seriously, you can easily implement these changes in life, but only if you want to. Cycling drunk from and to a party is not a bad thing. At least you are not mowing people of the sidewalk with your drunk ass in a car... Bad weather is not a reason to not cycle, as there is special clothing for that. And you would be amazed how much heavy stuff you can transport using your bike. Backpack + side bags/trailer = lots of stuff. There is no way you need the amount of stuff that one is able to carry.

Nuff said. There is no excuse for not taking a bike for the portrayed scenarios. The only excuse I am willing to accept from someone is: "I have no legs" or "I am so fat that I didn't see my penis for about a decade".
Friday, December 5, 2014

[Cycling Route] Euro Velo: Donauradweg from Switzerland to the Danube (Donau)

From Low-budget-holiday-ideas.blogspot.com

Estimated cost: Money for food, depending on the time you want to travel. As soon as you have passed Vienna, things will get remarkably cheaper. If you would use € 20 per day for food, add € 10 to be safe and multiply it with the number of days you'll travel. Add the train tickets to the total and perhaps - depending on the way you travel - your accommodation. You need strong willpower to keep a budget though. I will show how you can make a budget on this page.


Means of transportation: Bicycle and perhaps a train ride to the route itself

Min. duration: At least 10 days for a short trip along the Donau route.

In case you want to go along the whole donau per bike, it will take you 55 days, should you ride 80 km on average and it will take 148 days, should you cycle 30km per day.

Sights to see: Depending on where you start. I will start the route from the Atlantic sea and we will reach the black sea. You will pass beautiful cities and amazing landscapes.

Accommodation: Either in a tent, airbnb or by couchsurfing. You can combine many methods.

Season: Spring/Summer


How to prepare for the holiday (requisites): This part can be split in things that you ought to buy and things you ought to plan.


What needs to be purchased:

quechua long distance cycle trip
Large Pop Up Backpacking Camping Hiking Tent Automatic Instant Setup Easy Fold back - Blue


Explorer Giant Tactical Backpack, 24 x 18 x 8-Inch, Olive Green


What needs to be planned (more extensively explained on the bottom of the page):
  • The cycling route (distance, duration, budget, camp sites/hostels/bnb, ...)  

    • Based on your budget, duration, distance, etc., you can make a GPS track of the route and plan it thoroughly

  • The train ride from your home to the city of departure; and from the final destination back home

  • Determining when you will depart is very important. As soon as you know when to do this cycling trip, you have to book a train ticket and some camp sites / hostels on your way

 
What you can expect: An athletic cycling trip that will push you to your limits and will make you a lot more fit. It will give you time to think while cycling for hours; it will enable you to make friends in some regions that aren't overran by tourists* and to see a very different part of a European country. *Note: in tourist areas, you will - without a doubt - meet interesting people, but these people are much adepted to the tourists. It is very different to meet people that aren't adapted to tourism per se. A direct consequence of visiting more remote areas is the greater language barrier. Most Europeans - even in remote places - speak English or can at least express themselves in a limited manner.

How to plan a low budget long distance cycling trip

Step 1: determining YOUR route to the Danube


Duration I only got time off from 28.02.2015 at 5 PM (17:00) until 11.03.2015 (I have to get back on that day)

Distance I do not want to cycle every day and will travel a maximum of 50km a day. I live in Basel and I want to cycle to the Donau in order to cycle along it for a few days. I cannot determine the exact amount of km, yet I can make an accurate estimate of the distance. I want to cycle 6 out of 12 days, so that will result in 300 km. I will get back on this later in the guide.

Budget I live in Basel and have a max of € 350,- for 10 days available. 
Foodbudget
10 x (15+10) = € 250
I have the other € 100 for accommodation and a train ticket back. Let's see what is possible with this strapped budget. I will get back on this along the guide.

Accommodation You cannot plan too far ahead. Just decide what type of accommodation you can afford / - are willing to pay. I will go for camping spots. Let's keep it really low-budget.

Sights   I definitely want to see the "Donaueschingen", "Ulm" and the beautiful nature.

I have already made a first route (28.02.2015): http://www.bikemap.net/en/route/2901878-day-1-from-basel-to-albbruck/ 

Albruck to basil

If you look at the trip here, you'll see the distance. Unfortunately it's a bit more than the maximum distance a day. I've looked for a camping and found one here (near Albbruck).

albruck camp site spot

Step 2: plan per day

Second day (01.03.2015) route is also made on bikemap already: http://www.bikemap.net/en/route/2901901-day-2-from-albbruck-to-stuhlingen/

Cycling map donau route

Third day (02.03.2015): http://www.bikemap.net/en/route/2901912-day-3-from-stuhlingen-to-donaueschingen/

The fourth day (03.03.2015): http://www.bikemap.net/en/route/2901918-day-4-donaueschingen-to-hausen-im-tal/

Donau campspot
Fifth day (04.03.2015): http://www.bikemap.net/en/route/2901922-day-5-from-hausen-i-tal-to-riedlingen/

(a small note here: we still have a while to go before reaching Ulm. This means I'd have to adjust something)


Sixth day(05.03.2015): http://www.bikemap.net/en/route/2901926-day-6-from-riedlingen-to-ulm/

I've already planned a ticket in advance because you will get it cheaper. Click here to go to the site where can get your bahn tickets cheaper!

I actually have to get back on the 11.03.2015, but the soonest date I could go back would be 05.03, assuming I would cycle every day.


Only € 29,00 back! That means we only have to spend € 30 out of € 100 on transportation. The average price of a camping spot is around € 6 - and I have to say that it is a rather high average. 9 days x € 6 = € 54,- for accommodation. € 84,- is being spend on transport and accommodation. Add up the € 250 you were to spend on food and you've got yourself a really low-budget holiday!

Step 3: evaluate the cycling trip as a whole and fine-tune where it is needed

What we basically have now is a strucure where we can built our trip upon. We can not just cycle some time and sit on a bench staring the rest of the time. You start fine-tuning by deciding a few things. Where do I want to stay for what time and what do I do there?

After the third consequetive day peddling, I will reach Donaueschingen. Googling that place and after opening the wiki entry in German, I have actually found a manion / castle there: "Schloss Donaueschingen" and rather interesting sights to see ("Donauquellen"). The date is 02.03.2015. I want to stay here on the day of arrival of course and want to depart on the fourth of March in the morning. That means that I will stay in Donaueschingen for one entire day and depart on 04.03.2015. I want to keep cycling until Ulm for the next days. I will now reach Ulm at 06.03.2015 in stead of 05.03.2015.

I can stay in Ulm for 6 days before departing back to Basel or I can plan another few "days off". Maybe I want to visit Riedlingen as well for a day. Anyway, that is how you plan a low-budget-cycling-vacation!
Tuesday, September 23, 2014

How to plan your bicycle tour through Europe: Benelux, France and Spain tour (from Amsterdam to Santiago de Compostela)

Important note: for the combined use of GPS tracks, you will need software. You can find the software here.
Another important note: this route is the Saint Jacobs Cycling Route. Scroll all the way down and you will be able to find a link to a Belgium site that has the full route from Haarlem to Santiago de Compostela. You can download the GPS track and you do not have to alter anything at all!

Cycling the LF route from Amsterdam to the Belgian border

If you want to get more information on how to cycle through the Netherlands, please take a look at this link. You will see 2 different methods on how to plan a route within the Netherlands. Because I have already dedicated a page to this, I will keep it short and I will assume that you want to start your tour from Amsterdam and go to Belgium (Antwerpen).

Please open: http://www.nederlandfietsland.nl/landelijke-fietsroutes/overzicht-lf-routes/lf2-stedenroute
Take a look at the map on the right side. You can zoom in and look at the cities you will pass. Starting from Amsterdam, you will have to look for the signpost "LF 2". Just keep following this sign and you will be able to reach the Belgian border. Important note: there is the possibility of downloading a GPS track for this route and I recommend you to do so.

Cycling the LF 2 from the Belgian border to Antwerp

All right. So you've cycled all the way through the Netherlands and you have reached the Belgian border. Very nice. Now you will have to follow the LF 2 route until you reach Antwerp. Afterwards, you will have to switch your cycling route. Here I really recommend you use a GPS, as this bicycle route is not an 'official route'. This cycling route is designed by Clemens Sweerman and this route is perfect to reach Paris.

Please take a look at this site: http://www.groteroutepaden.be/route.php?itemno=259
You will have to use Google translate to understand this site, as the content of the English version of this site is very limited (as always). I do not understand why these sites have more content in the native language. It seems like a good idea to make the content equally available in all languages because of tourism and such. Oh well...

You can download the GPS track for the "Van Gogh Route" by Clemens Sweerman, so you can reach France (Paris).

I would've used the EuroVelo route 3 from Paris to Santiago de Compostela but it is not realised yet...

I really cannot express the disappointment regarding EV more than I have already. Not 1 single route is fully realised and I just cannot understand why. Anyway, look at this picture. The route would have been ideal but as long as it isn't realised, I cannot use this at all.
Not realised Not planned lazy bureacrats
Isn't this just bollocks? 5/6 is not realised. I would not even call this a route. It is nothing pretending to be something.
So... because Europe isn't really making an effort to realise the so-called routes, I will - once more - use national cycling association websites to reach Pamplona (Spain). The real problem is that even the national sites are incomplete and useless. I searched really, really hard and found nothing. Then I went back to the Belgian website and found a route to Santiago de Compostela. Really awesome. Here is the link: http://www.groteroutepaden.be/nl/route/232/st-jacobsroute---europafietsers.html

This is a Pilgrims route as well as a cycling route. You will pass hostels and will find lots of places to camp. Really awesome. I guess the Belgian sites trump the French sites. All my respect goes out to Belgium!
Wednesday, September 3, 2014

Buying Spare Parts: Wheel [part 2]

Click here to see the previous post that shows you how to repair or change the tubes and tires.

Repairing a bike is quite easy as long as you know how to do it and what to look out for when you buy spare parts. A good example of ignorance is when I tried to buy a tube for my back wheel. I bought the wrong size of air valve (too short) and the wrong size of tube itself (wrong diameter). The durability of the tube was extremely low as it only held out 100 km before bursting. Hence it is crucial to buy the highest quality of spare parts and it is of the utmost importance to know which spare parts are needed for your bicycle in particular. The quality and durability is especially important while trekking or traveling long distances. In this post, I will try to explain the steps one ought to take to ensure safe, long lasting and qualitative cycling. I will also share the spare parts that I can recommend based on personal experience and feedback from the cycling community online. If you do care about getting the best prices, you ought to buy your parts from the internet instead of a store, as it is mostly a lot cheaper AND because you can choose between a broader assortment of products.

I'll give you a list of products that you might need first. You will have to read through the tutorials before buying the parts, as you are probably not aware of what is needed and what isn't. Throughout the article I will use the abbreviation [opt.]. It means that it is not a necessity, but it might save you time and nerves if you use it. It won't ensure better quality though. The quality solely depends on your handiness and you using your brain.

A list of spare parts for your bicycle that you might or will need throughout this guide


Click the link or picture to be redirected to the product.

Adjustable wrench repairing a bicycle
Different sizes of adjustable wrenches
An adjustable wrench is needed for all repairments on your bicycle. Most handy (wo)men already have this tool and I presume - as you are reading this - that you have one as well. Dislocating a wheel will be impossible without a wrench unless your thumbs are made out of iron.

Metalspokes for bicycle
10 Replacement spokes: Silver tone metal spokes (11" = 27,94 cm)
Before buying, I have to urge you to measure the size of your spokes. It is very important to have the correct size. It might also be best if you read through the tutorial BEFORE buying these tools.
Metalspokes 10 inch bicycle
10 Silver Tone Metal Bike Twisted Spokes (10.4" = 26,42 cm)
Again, measure before you buy it. These spokes are of good quality and should be easy to implement as long as you read the tutorial beforehand. Good luck!
Spokewrench for trueing and alligning your wheels
Avenir Spoke Wrench Set
In my opinion, it is always good to have spoke wrenches. You can true / allign your wheel at any time and before the damage is so severe that a spoke wrench can't fix it. An alternative would be to use a wrench even though this is a lot better.

Replacing your spokes and repairing a bent wheel (also called "wheel allignment" or "trueing your wheels")

Replacing a spoke

I have to be honest here. I never came as far as to repair my spokes. On the other hand, I have fixed my bent wheel using the spokes. I will first teach you how to replace a spoke, based on what I have read on the internet, before I move on to repairing a bent wheel. Be wary: it is a rather difficult process and you will have to develop skills and intuition in order to fix the problem.
  1. What do you need to know about your wheels in order to change the spokes?

    There are different sizes of spokes out there. Because of this, it is important to measure one of the spokes or - if possible - to look up the specifications of the bicycle in order to know the correct size. If you cannot find the correct size by looking at the specs, you will have to start deconstructing your bike in order to find the measurements. That is basically all you need to know for now.
  2. How to change the spoke(s)?

    What do we need: an adjustable wrench (to dislocate the wheel), pliers (to bend the spoke close to the hub), a spoke wrench, a pump, 2 sturdy table spoons and of course the replacement spoke.
    How to replace a broken spoke:
    you'll need to remove the tube and tire in order to decrease the chances of getting a pinch flat. It is possible that the spoke - when inserting it in the rim - will reach the tube and puncture it. Hence it is detrimental to not remove the tire/tube first. To know how you detach these parts, you'll have to read through the previous steps (how to repair/change a tube).

    Let's start:
    • First you place your bike upside down and put it in a firm position. It is a good idea to clamp the bike or to have a friend help you with keeping the bike stable. 
    • The next step is to detach the tire and tube from the wheel. If you have done that, you either need to remove a good spoke in order to know its size or - should you already know the size - skip to the next step. You can remove a spoke by using the spoke wrench to loosen the screw where the spoke meets the rim. Use your pliers to bend the spoke-end at the hub of the wheel 90°, enabling you to slide the spoke out of the hole located at the hub. If you have done so, you'll have to measure the spoke in order to know its dimension. Be sure to calculate a bit of wiggle room. If your spoke is too big in the end, you'll need to shorten it with a wire cutter.
    • Take the new spoke and put the part without the screw end through the hole of the hub. FYI: the screw end is the part that you will have to attach to the rim by putting the nipple in the whole of the rim and screwing the spoke in the nipple (repairing a bike sounds somewhat sexy or perverted). Bend the spoke that went through the hub slightly so it stays in position. If the nipple is attached to the spoke when you bought it (that is the case most of the time), unscrew it and put the nipple through the hole on the rim. Take the screw end and carefully insert it in the nipple. Tighten it a bit by hand and make sure that the nipple doesn't stick out through the rim. If it does stick out, you can fix this by putting more spoke through the hub, thus shortening it.
    • You will have to 'true' your wheel, as it will probably be bent. Please move on to the next tutorial in order to get your bike fixed up and ready to go.

Trueing your wheels / Fixing a bent wheel / Straightening a wheel / Wheel Allignment

  1. How to fix a bent wheel?

    In theory, it seems like quite an easy thing to do. In practice, however, this will require you to develop a skill. With my instructions, you will at least be able to do this in theory. Be wary though, taking things too fast and doing it without caution will result in an even more bent wheel. Don't get scared though. You'll get the hang of it in no time. I haven't damaged my wheel beyond repair and neither will you (if you are careful).
    What do we need: a spoke wrench, a pencil or chalk to mark the bent, patience and a good eye for detail.
    How to straighten your wheel: put your bike upside down and put it in firm position (as always). Rotate your wheel and watch the brake pads. It is important to really take your time here. While spinning the wheel, you will notice that the distance from the brake pad and the rim will decrease and increase while you are spinning it. If not, your wheel is not bent and you do not need to straighten it. If the wheels rubs the right brake, it is bend to the right and vice versa. Take a look at the hub. You will see that the spokes come from the left and from the right. Should your wheel be bent to the right, you will have to tighten the spoke coming from the left side. When it is bent to the right, loosen the right side and tighten the left side (SLIGHTLY! never ever overdo it, as it will decrease durability). Try to tighten not just 1 spoke but also the 2 (or more) spokes next to it. Every small adjustment you make should be evaluated by spinning the wheel. Here it is important to have a keen eye for detail. If you do not have it, try put an object between the brake pad and the rim in order to determine the space between brake pad and rim. Should the object fit on one place, it has to fit the whole 360°. If not, you'll have to do some more straigthening on the spot it does not fit. Just repeat the process over and over again and you will have a straightened wheel.

Buying Spare Parts: Wheel [part 1]


Click here to see the next post that shows you how to fix a bent wheel and change a broken spoke.
Repairing a bike is quite easy as long as you know how to do it and what to look out for when you buy spare parts. A good example of ignorance is when I tried to buy a tube for my back wheel. I bought the wrong size of air valve (too short) and the wrong size of tube itself (wrong diameter). The durability of the tube was extremely low as it only held out 100 km before bursting. Hence it is crucial to buy the highest quality of spare parts and to know which spare parts are needed for your bicycle in particular. The quality and durability is especially important while trekking or traveling long distances. In this post, I will try to explain the steps one ought to take to ensure safe, long lasting and qualitative cycling. I will also share the spare parts that I can recommend based on personal experience and feedback from the cycling community online. If you do care about getting the best prices, you ought to buy your parts from the internet instead of a store, as it is mostly a lot cheaper AND because you can choose between a broader assortment of products.

First I'll give you a list of products that you might need. You will have to read through the tutorials before buying the parts, as you are probably not aware of what is needed and what isn't. Throughout the article I will use the abbreviation [opt.]. It means that it is not a necessity, but it might save you time and nerves if you use it. It won't ensure better quality though. The quality solely depends on your handiness and you using your brain.

A list of spare parts for your bicycle that you might or will need throughout this guide


Click the link or picture to be redirected to the product.

Adjustable wrench repairing a bicycle
Different sizes of adjustable wrenches
An adjustable wrench is needed for all repairments on your bicycle. Most handy (wo)men already have this tool and I presume - as you are reading this - that you have one as well. Dislocating a wheel will be impossible without a wrench unless your thumbs are made out of iron.


Contitube with presta valve replacement
For the Presta valve bicycle tube, you can click the picture or the hyperlink above. This is mostly for racing bikes. Be sure to select the correct size on the website.

bicycletube schrader valve thornresistant
If you need a Schrader air valve (also called 'auto' or 'car' valve), you can buy it here by clicking the blue hyperlink or the picture.
repairkit for fixing your bike
Compact Design 16 in 1 Multi Function Purpose Bike Bicycle Cycling Tyre Repair Tool Kits Complete Set + Mini Portable Pump
I am really, really fond of this neat little product. It has everything you need. You can dislocate the chain, pump, dislocate the wheel and patch your tube. All in one. Another advantage is that you can take it everywhere with you due to the small and compact bag (which you can attach to your bicycle). A must have for a trekker; a nice gadget for the sporadic bicyclist.
bike floor pump to repair or mend
Serfas TCPG Bicycle Floor Pump with pressure meter [opt.]
I have taken a similar floor pump on a trip through Europe. Here is the thing: if you have a pinch flat, it is perfectly possible to travel an estimated 10 km. That is basically my own estimation based on experience. I've had 2 pinch flats in the middle of nowhere and one time I traveled about 20 km, the other time it was only 5. Anyway, if you have to pump your bike every few km, you'll be so happy that you've bought this product. It is a nice item to have at home, as it is just a lot faster and you can really see what the pressure on the tube is. An alternative is to have a hand pump, as seen in the previous repair kit. That is a must-have if you do not have a floor pump with you! You need at least 1 pump.
Continental 28" Road Bike Tyre Sprinter Gatorskin
Continental 28" Road Bike Tyre Sprinter Gatorskin 
This is a tubular tire. It is meant for racing and sprinting and is of very high quality. Not many people need such a tire, but if you need it, this is probably the best you can get and afford.
Biking through europe: biketire high quality

Continental Gatorskin Wire Bead Road Bike Tire [opt.]
A very good high quality tire. You might need it in case your old tire is worn out. That is why I labeled the tire as optional. The on-page description states that it is highly suited for high mileage during the winter.

Now we will start out with parts that have to be replaced quite often.

How to repair or change parts of your wheels

Let's say that the wheel consists of the spokes, air-valve, rim, tire, tube inside the tire, brake and the brake pad (also called the 'shoe'). Every single part can easily be replaced by a spare part, as long as you know where to buy it and how to change parts. Like most things in life, it is easy if you know how to do it.

Replacing your tube/tire and patching your tubes

  1. What do you need to know about your wheels in order to change the tube?

Look up the specifications of the wheel/bike you have. Most of the time, the size is mentioned on the rim in case you have lost/can't find the specifications (700c with 20-50mm width, 26", 27", 28", 29", etc.). You will also have to consider that there are various sorts of tires, albeit that most are of the type 'clincher'.

A clincher tire is a U-shaped tire where the tire and tube are 2 separated from each other, meaning that you can easily change both parts independent of each other.

A tubular tire, also known as a sew-up, sprint or tub, is a type of tire where the tube is attached/sown/glued to the tire. If you have this type, you are probably a fanatic high-performance cyclist and you probably would not need this guidance.

A wired tire is nowadays the same as a clincher type. The wire refers to the the steel wiring in the bead (the outer edge of a tire that clinches to the rim). There used to be a time where clincher types relied only on air pressure to clinch itself to the rim. Nowadays, it also relies on the steel wiring in the bead to attach itself to the rim. All clinchers are wired.

A tubeless tire holds air without having a tube. They are mostly used on mountain bikes, as the chances of the pinch flat are decreased tremendously. A pinch flat is when your inner tube gets punctured, so it is actually impossible to get a pinch flat. However, due to the too much lateral force, it is possible that air escapes the tire.

A solid tire is, as the name might indicate, works without air. I would not recommend this tire for many reasons, one of them being the loss of suspension quality which results in many complaints. In the long term, due to the loss of suspension quality this might be terrible for your spine.
  1. How to change the different types of tubes and tires?

The process of changing tubes and tires does not vary much between the various types. I will start with the conventional type.
    1. How to patch the clincher type:

I have changed many clinchers in my life. In fact, my mother first thought me how to do it. For that reason, I will use her method even though better methods are available.

What do we need: 2 sturdy table spoons [opt.], a wrench, soapy water
[opt.], a spare tube (duh), a repair-kit, a small tub/bucket of water and a pump.
How to change/repair the tube:  Look for a place where you can stabilize your bike and turn it upside down. For your convenience, the bike should be very stable. There is no need to dislocate the wheel. Fact is that dislocating the wheel makes everything a lot easier to handle, but my mother never dislocated it (as she was afraid that she would mess up the gear shift). Dislocate the tire from the rim by hand. If that is not possible, use the table spoons to separate it (with caution, as you might damage the tire). Take out the tube and fill it with air to locate the hole. If the air escapes so fast that it is impossible to inflate it, your tube is beyond repair and you will need to change the tube. If not, you can mend it using your repair kit.

Let's assume that you can actually patch the tube. Locate the whole using the tub/bucket of water. You do this by inflating your tube and holding it under water. If you see bubbles coming to the top, you have found the hole. To ensure that you have only 1 hole, rotate the wheel 360° and hold it under water. Deflate and patch it using glue and a rubber patch. Just follow the instructions of your repair kit and you should be fine. After your patch has dried up, you can put the tube back. I always put the air valve through the hole first and then I pump a little bit of air in the tube. This makes it easier to stuff the tube in the tire. Make sure that the bead is attached to the rim. If you managed to do this, you can fully pump it up and it should be repaired. Wooohoo, you managed to save yourself money and you can even get a flat tire in the middle of nowhere without being totally helpless.

Another scenario might be that your tube is beyond repair. Things might get a bit more complicated, as you will have to dislocate the wheel. If it is your back-wheel and you have a gear-change, you will have to be extremely careful that you know exactly how to put it back.

Dislocate the wheel, remove the tube using the previous steps from the first scenario and take your spare part. Insert it and put everything back in its place. It isn't hard as long as you know how to do it. If it is your first time, make sure to read through the steps a few times. If you need personal assistance, you can contact me per mail and I can give you support through skype. Biking.thru.europe*-at-*gmail.com

The tire itself can also be dislocated by using force. It is important to know the dimension of the wheel. If you do not know what the dimension is, you can easily buy the wrong product. Diameter and width are mentioned in various ways. Try to Google the dimension mentioned on the rim of the wheel and you can be sure that you buy the correct product.
    1. How to change or patch a tubeless type

What do we need: a wrench, soapy water [opt.], a spare tire and a pump.How to change the tire: For this type, you really should not use the spoons, as the bead should never ever be damaged. The sealing of the tire is what holds the air inside. Use soapy water to help you dislocate and relocate the tubeless type. Everything else is basically the same as the clincher type. However, if you still need a tutorial for this type, you can have a look at the PDF file provided by the brand Shimano (click here).
    1. How to patch the tubular type

How to change/repair the tube: Don't. Seriously, don't do it. It is not worth your nerves and time. It is close to impossible and it does not make sense to be honest. You probably use this type to compete in races or in another competitive way and you will greatly decrease the quality of your tire by mending it.
    1. How to patch the solid type

There is no need to patch this. In fact, there is no need to have this type of tire at all, unless you are planning to cycle on shards of glass.