Showing posts with label brake shoe. Show all posts
Friday, December 12, 2014

Buying Spare Parts: Brake and Brake Shoe (Part II)

Repairing a bike is quite easy as long as you know how to do it and what to look out for when you buy spare parts. A good example of ignorance is when I tried to buy a tube for my back wheel. I bought the wrong size of air valve (too short) and the wrong size of tube itself (wrong diameter). The durability of the tube was extremely low as it only held out 100 km before bursting. Hence it is crucial to buy the highest quality of spare parts and it is of the utmost importance to know which spare parts are needed for your bicycle in particular.

I'll give you a list of products that you might need first. You will have to read through the tutorials before buying the parts, as you are probably not aware of what is needed and what isn't. Throughout the article I will use the abbreviation [opt.]. It means that it is not a necessity, but it might save you time and nerves if you use it. It won't ensure better quality though. The quality solely depends on your handiness and you using your brain.

Spare-parts list


Pyramid - Mx1000 Alloy BMX Bicycle Brake, Front or Rear, Black (very cheap and not sturdy)


SRAM Apex Brake Caliper Set (WITHOUT CABLES; high quality)


ORIGIN8 Sport Comp V-Brake Set (medium quality; complete set; good for your average bike)


SHIMANO ST-EF51 Brake & Shifter Levers Combo Set 3x8 Pair With Shift Cable And End Caps (only cables and housing; brakes themselves are still needed)


Campagnolo - Veloce Silver Dual Pivot Brake Set (expensive but high quality; only the dual pivot brake is delivered)


10 Pcs 1.77M Length Bike Replaceable Cycling Rear Brake Cable (low quality; high quantity buy)


Shimano Brake Cable and Housing Set (Universal)
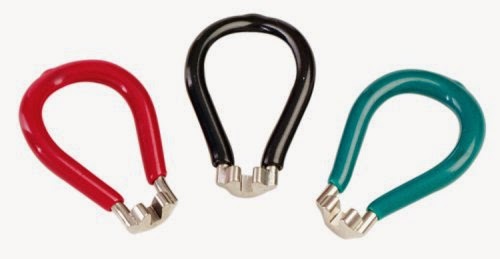
Spokewrench for trueing and alligning your wheels
Avenir Spoke Wrench Set
In my opinion, it is always good to have spoke wrenches. Your brakes might seem to be broken bbut the problem might as well be caused be a bent wheele. You can true / allign your wheel at any time and before the damage is so severe that a spoke wrench can't fix it. An alternative would be to use a normal wrench even though this works a lot better.


Issues regarding the brakes

As the problems can be so diverse, I think it is wisest to start with the smallest problems and move to more complex issues. If you look at the brake lever on the handle bar, you'll see a small screw and a slightly bigger screw. The big screw is the "brake barrel adjuster" and the small screw is the "adjuster locking ring". With this screw you can adjust the tension on the brake and increase or decrease braking power. I regard this as the easiest fix for a very common problem.

Repair guide: easy cases

Now that we've covered the easiest way to increase braking power, we can move onto the more complex issues.

Centering your wheel might be a solution to a problem you might have. Do you know the feeling when every time the wheel fully rotates, it feels like the brake makes contact with your rim? Tip your bike or hold it while rotating the wheel. Does the rim make contact to a brake pad? Does the wheel look crooked? Well, there can be 2 possible problems: 1. your wheel is not straight in the fork; 2. your wheel is bent. To solve a bent wheel, please look into this guide. To fix the first problem, just unscrew the wheel on both sides and fix the problem by repositioning your wheel.

Check your brake blocks to see if they are worn out. If needed, you can use a list of spare parts that I'll provide. Also make sure that both blocks are perfectly opposed to the rim so that the full block connects to the rim (in stead of only a partial connection). Should a brake block change be needed, be sure to change both blocks. You can check our spare-parts list to find different kinds of brake shoes.

Check the noodle to see if it is connected. I know it sounds stupid but sometimes one can overlook the simplest thing. The noodle is the metal tube at the end of the braking cable that clamps in the cable housing. Sometimes it doesn't fully clamped in the cable housing, which causes less tension on one brake and no tension at all on the other.

Repair guide: normal cases

These problems are a bit harder but still quite easy. You will notice that impatience is your enemy, mainly because you need a steady hand and some trial and error. So take your time, don't give up and try to use your head a bit. Just think logically and mechanically.

If there still isn't enough tension on the braking cord, make sure that you know (!) which kind of brake you have. Not every brake is built in the same way. Anyway, at the very end of each cord, there is a metal nipple which is attached to a screw. Should you unscrew it, the metal cable will lose tension and you are able to pull it a bit further than it was before. Screw it in again (...) and test your brakes to see if the increased tension is better.


Repair guide: hard cases

Replacing the brake altogether is also a possibility if your brake is really destroyed beyond repair. I couldn't imagine the brake being so damaged it would need replacement. Maybe when a maniac with an axe would turn his rage on the poor brake, I could imagine replacing it seems necessary. As every brake is different, I cannot give you full details to replace the brake altogether. One can assume that there is a manual with every brake you buy.

Replacing the brake as a whole

However, for those who haven't got a manual or tutorial on how to install a brake, I will crudely explain how to change the brake-set (cables, housing+lever, brakes).

Always start with attaching the lever on the bicycle. You will start from the lever and move to the actual brake, as you need to adjust the tension of the iron cord at the end of tutorial. As soon as the lever is attached to the handlebar, start with clamping the 'nipple' inside the lever. Move the iron cord through the barrel adjuster and put it in its middle position. That way you can tighten or loosen it after you are done. Having it screwed all the way in or out renders your barrel adjuster useless.

Moving on... You have attached the lever, clamped the brake cable nipple and now you are standing there with a brake cable in your hand. Start directing the cable along the top tube for the rear brake and directly to the fork for the front brake. If you haven't attached the brake to the front fork or rear seatstay (the bar diagonally under your seat) before I told you to do so, do it now.

Next step is to put the last bit of wire through the brake itself and to put the right amount of tension on the wire. You do this by pulling the wire and simultaneously tightening the screw.

Good luck!
Buying Spare Parts: Brake and Brake Shoe (Part I)

Repairing a bike is quite easy as long as you know how to do it and what to look out for when you buy spare parts. A good example of ignorance is when I tried to buy a tube for my back wheel. I bought the wrong size of air valve (too short) and the wrong size of tube itself (wrong diameter). The durability of the tube was extremely low as it only held out 100 km before bursting. Hence it is crucial to buy the highest quality of spare parts and it is of the utmost importance to know which spare parts are needed for your bicycle in particular.

I'll give you a list of products that you might need first. You will have to read through the tutorials before buying the parts, as you are probably not aware of what is needed and what isn't. Throughout the article I will use the abbreviation [opt.]. It means that it is not a necessity, but it might save you time and nerves if you use it. It won't ensure better quality though. The quality solely depends on your handiness and you using your brain.

A list of spare parts for your bicycle that you might or will need throughout this guide


Replacing your brakes and replacing a brake shoe (brake pad or brake block)

Before I start explaining, you will have to be aware that there are different kinds of brakes. What kind of brake you have is important to know how to replace it. Some of the brakes I will refer to are obsolete. I only mention them so you can understand the many changes the bicycle brake went through.

Spoon brake (or plunger brake)

If you have a spoon brake, you must have an antique bicycle. A spoon brake metal plate is directly pressed upon the tire of the wheel. The plate is attached to a rod that is mostly positioned at the right side of the handle bars. I doubt the fact that you will have to replace this part as it is not manufactured anymore.

Duck brake (Duck roller brake)

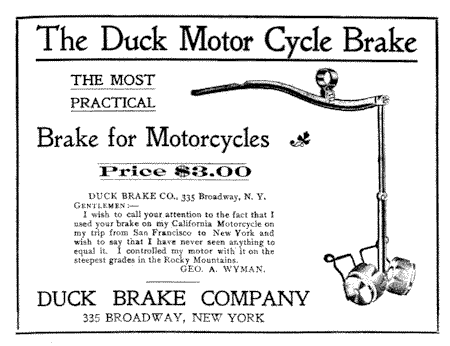
This brake made the spoon brake obsolete and was invented around the end of the 19th century. It was operated by a rod connected to a lever on the handle bar. You can brake by pulling the lever, so that 2 friction rollers are forced against the front wheel.
Source: earlymotor.com/leon/bikes/california/images/duck.gif

Coaster brakes, Back Pedal Brakes, Foot Brakes, Torpedo or Contropedale

By reading the title, you know which brake comes next. I like this brake a lot and associate it with a classic Dutch 'granny bike'. A granny bike (oma fiets) is a very typical bicycle with very typical features. It's always a ladies' bike, has a classical touch (design, slight rust, colour, etc.) and has no gears or three gears. Oh, and it has a back pedal brake. Just enter 'oma fiets' in Google and you will see what bike I am talking about.

A coaster brake is located in the back hub of the wheel. It is operated by pedaling backwards, which makes the sprocket drive a screw which forces a clutch in the opposite direction of the axle. This will either force two brakeshoes against the brake mantle or into a split collar expanding it against the mantle.

Rim brakes: many variations of the same kind of brake

There are so many kinds of rim brakes. Even though the basic principle is the same, they differ on many levels.

It will take a while to make repair guides for all these sub categories of rim brakes. As there are so many kinds of rim brakes, I will spread the tutorials over a few articles, making sure that I will cover all variations of rim brake in one article.

Rod brake

A rod brake, also called a rod-actuated brake or stirrup brake (due to their shape), is used by pulling a rod that is placed under the whole handlebar. The rod is connected to a brake with brake shoes. The brake shoe presses on the rim, to stop the wheel from rotating. These brakes are still in use in the third world.

Caliper brake design

Single-pivot side-pull caliper brakes

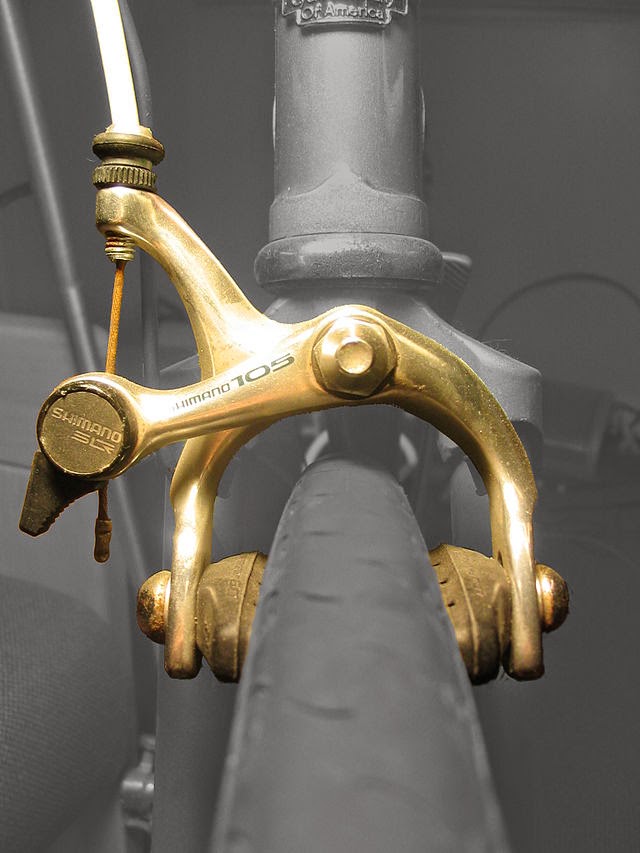
The Caliper brake design is a type of brake in which the brake mounts to a point above the wheel, allowing the arms to auto-centre on the rim. The single-pivot side-pull caliper brakes consist of two arms that cross at the pivot and hold the brake shoes on the opposite side of the rim. When the lever is pulled, the arms will contract, making the brake shoes press upon the rim. This brake is used on older racing bikes. I have an old bicycle (not here now though), so I'll have a look at my brake.
Source: upload.wikimedia.org/wikipedia/commons/thumb/8/80/Bicycle_caliper_brake_highlighted.jpg/170px-Bicycle_caliper_brake_highlighted.jpg

Caliper brake design: Dual-pivot side-pull caliper brakes

Most modern race bikes have a dual-pivot side-pull caliper brake. The cable housing attaches like that of a side-pull brake. One arm pivots at the center; the other one pivots at the side, much like a center-pull.

Caliper brake design: Centre-pull caliper brakes

I have had this brake on 80 % of my bikes. This is like the most typical brake. A small lever on the left and right side of the handle bar is attached to the front and rear tire of the bike. The brake consists of the arms, symmetrically opposed to eachother and connected in the middle with a screw. On the end of these arms are brake pads, which positioned opposed to the rim. These brake arms are connected to the lever by iron cables and - before the cable reaches the arms - these cables get split using a 'sliding piece' (also called "braking delta", "braking triangle" or "yoke"). The tension will be evenly divided between both braking pads, making these braking pads ideal to true your wheel ( see: Trueing your wheel: buying-spare-parts-wheel-part-2.html ).

U-brakes (990 style brakes)

Commonly used on BMX and considered as the default brake. The caliper design with pivots is right above the rim. The arm pivots attach directly to the frame as opposed to the centre-pull brakes. In its maintenance, it is quite similar to roller cam brakes.

Cantilever brake design

All cantilever brakes are dual pivot brakes, where each arm is attached separately on one side of the fork. This brake is mainly used for wide tires, commonly used on city bikes and mountain bikes.

Traditional cantilever brakes

The traditional cantilever brake even predates the direct-pull brake. It consists of 2 outwardly angled arms on each side, a cable stop on the fork to terminate the cable housing, and a cable connecting the arms like a centre-pull caliper brake.

V-brakes

The V-brake is a trademark of Shimano and is also called linear-pull brake. With no intervening mechanism between the cable and arms, it is also called a direct-pull brake. A cable moves from the lever on the handlebar towards the cable housing. Before it reaches the cable housing, it will move through a 'noodle'. This is a metal tube that moves 90° to the cable housing, which is placed horizontally above the tire. The end of the cable is attached to the arm opposed to the side of where the cable came from (normally on the right side). If the cable would only be attached to this arm, then it would be the only working brake pad, as there is no pressure on the other brake arm. Here the noodle comes in to play. The noodle is clamped in the cable housing and pulls the other brake arm simultaneously. I'd say that it is the most important part of the brake and should be qualitative. You wouldn't want it to bend when you need it most.

Mini-V-brakes are also a kind of V-brake but smaller. Not going to write to much about this one.


There are more kinds of brakes but I am not going to spend time on it right away.
  • Roller cam brakes
  • Delta brakes
  • Hydraulic rim brakes
  • Rim brakes with self-assisting characteristics
And then there are more categories than rim brakes like disc brakes, drum brakes, drag brakes and band brakes.

We will get into that too. First I'll have to work on the repair guide. You'll read about that in part II.